Sunday, July 7, 2013

Summer Luncheon in the Garden

Being a teacher is hell ten months out of the year.  Between working ten to twelve hours a day and bringing work home on the weekends, there is little time for me to plan events.  But then comes summer break.  Ahhh two months off to enjoy sitting by the pool, playing with my kids, catching up on some good reads and of course doing some entertaining, cooking, and baking!
Last week I hosted a luncheon for some of my colleagues as a kind of kick off to summer vacation.  I thought that I'd share the event with you.

Surprisingly, the weather in Chicago has been cooperative.  Usually it's hot and humid by July and not much fun to relax outside in.  However, the first week in July was PERFECT!  I planned for outside seating with a light home made (fait maison) menu consisting of brioche, vichyssoise, a light salad that my girlfriend made, lemon tart and a nice chilled Prosecco.  


I always use the Pate A Brioche Fine recipe in Julia Child's Mastering the Art of French Cooking, V.2 on page 85.


I find that one of the most important parts of hosting an event (other than serving amazing food) is decor.  Setting a beautiful table makes a great first impression. This is the first thing that guests will see.  I never understood going to someone's home and being served on paper plates, plastic silverware, or plastic cups.  I mean that was fine in college, but come on!  We're adults and it doesn't take that much effort to bring out the good stuff for company.  Maybe I'm old school, but guests appreciate it.  Plus, if you're going to spend time and money planning an event, don't skimp.


I absolutely love the silverware pictured above (Tudor Plate "Queen Bess" made by Oneida).  The delicate vintage flower detail was perfect for the garden theme.  I purchased the entire 14 place setting set at one of the many antique fairs I visit looking for great pieces.  These fairs are hosted on fairgrounds throughout the summer in various country towns in Illinois. .


This vintage soup tureen made the perfect serving vessel for the vichyssoise.  I kept the soup chilled in here in the refrigerator until it was time to serve.  The vichyssoise recipe can also be found in Mastering the Art of French Cooking V.1 page 39 by Julia Child.


Bon Appetite!


Tuesday, May 28, 2013

French Macaron Wedding Favors

French Macarons

Masterfully made miniature morsels from heaven. (pardon the alliteration, that's the language arts teacher in me)  In Paris, Laduree is THE place to try these unbelievably delicious little cookies.


favors


Yes, many bakeries in the U.S. sell them and I have found a couple of hidden gems in Chicago where they make them pretty darn close to the ones, o.k. hundreds, that I ate at Laduree's.  My favorite is a little bakery called Le Flour in the Edison Park neighborhood of Chicago.  The owner, Nicole, is a former teacher turned baker extraordinaire. If you ever find yourself in that part of town, it's worth checking out.

Making macarons yourself is not for the faint of heart, but it is certainly do-able.  As Julia Child once said 

“The only real stumbling block is fear of failure. In cooking you've got to have a what-the-hell attitude.”

Excellent ingredients are key.  DO NOT substitute.  If the recipe calls for caster sugar (which is super fine sugar) then use caster sugar!  Believe me.  It makes a difference.  The other thing to note is the aging of the egg whites.  They really should be left out at room temperature for at least 3 days.  The eggs in this country are pasteurized, so it shouldn't be an issue.  (I have a friend who's husband studied microbiology in undergrad school.  He's always having fits when my friend leaves food out on the counter for more than 15 minutes,  he would have a heart attack if he knew about the egg whites having to age , HA HA!)  If you've ever gone grocery shopping in Europe, then you know that the eggs are not in the refrigerated section.  They just keep them on a shelf or in a bin at the outdoor markets.  

Before starting the actual baking, you want to make sure that you have all of the necessary supplies and equipment clean and ready to go along with the needed ingredients.  

MUST HAVES:


  • an accurate kitchen scale
  • food processor
  • hand mixer or standing mixer with whisk attachments
  • 2 sizes of stainless steel mixing bowls
  • parchment paper
  • at least 2 heavy baking sheets
  • rubber spatula
  • pastry bag
  • 1/2 inch or wider pastry tip


My kitchen scale is ancient, but I'm nostalgic!  My mom brought it with her from Germany and I confiscated it a long time ago.  Every recipe in Europe, be it French, Italian, German, etc has the ingredients listed in grams.  Personally, I prefer it because it makes cooking a lot more precise. 

Ingredients:


  • 3 egg whites
  • 230 grams powdered sugar
  • 125 grams of almond meal 
  • 30 grams caster sugar
  • food coloring (liquid or gel)


First, combine the powdered sugar and the almond meal in the food processor and process for 3-4 minutes, stopping the machine to scrape down the sides half way through.  This helps to break up any lumps and mixes the two ingredients thoroughly.  


Next, sift the powdered sugar and almond meal mixture into the smaller stainless steel bowl.  Sifting will ensure that your macarons won't be gritty.


Set the bowl aside.


Then get ready to whip the egg whites. Put the large stainless steel bowl in the freezer for 15-30 minutes.  The cold bowl will help to get your egg whites nice and stiff when you whip them.  With the whisk attachments on your mixer, whip the egg whites at medium speed until they get foamy and white.


At this point, add a little of the caster sugar while the mixer is running.  Continue to beat the egg whites and slowly add the rest of the sugar.  Whip on high speed about 5 minutes more or until your egg whites are firm, glossy and creamy looking.  A good way to check if they are the right consistency is to stop the mixer and pull out the whisks.  Do the eggs form stiff peaks?  If not, keep beating until they look like this:


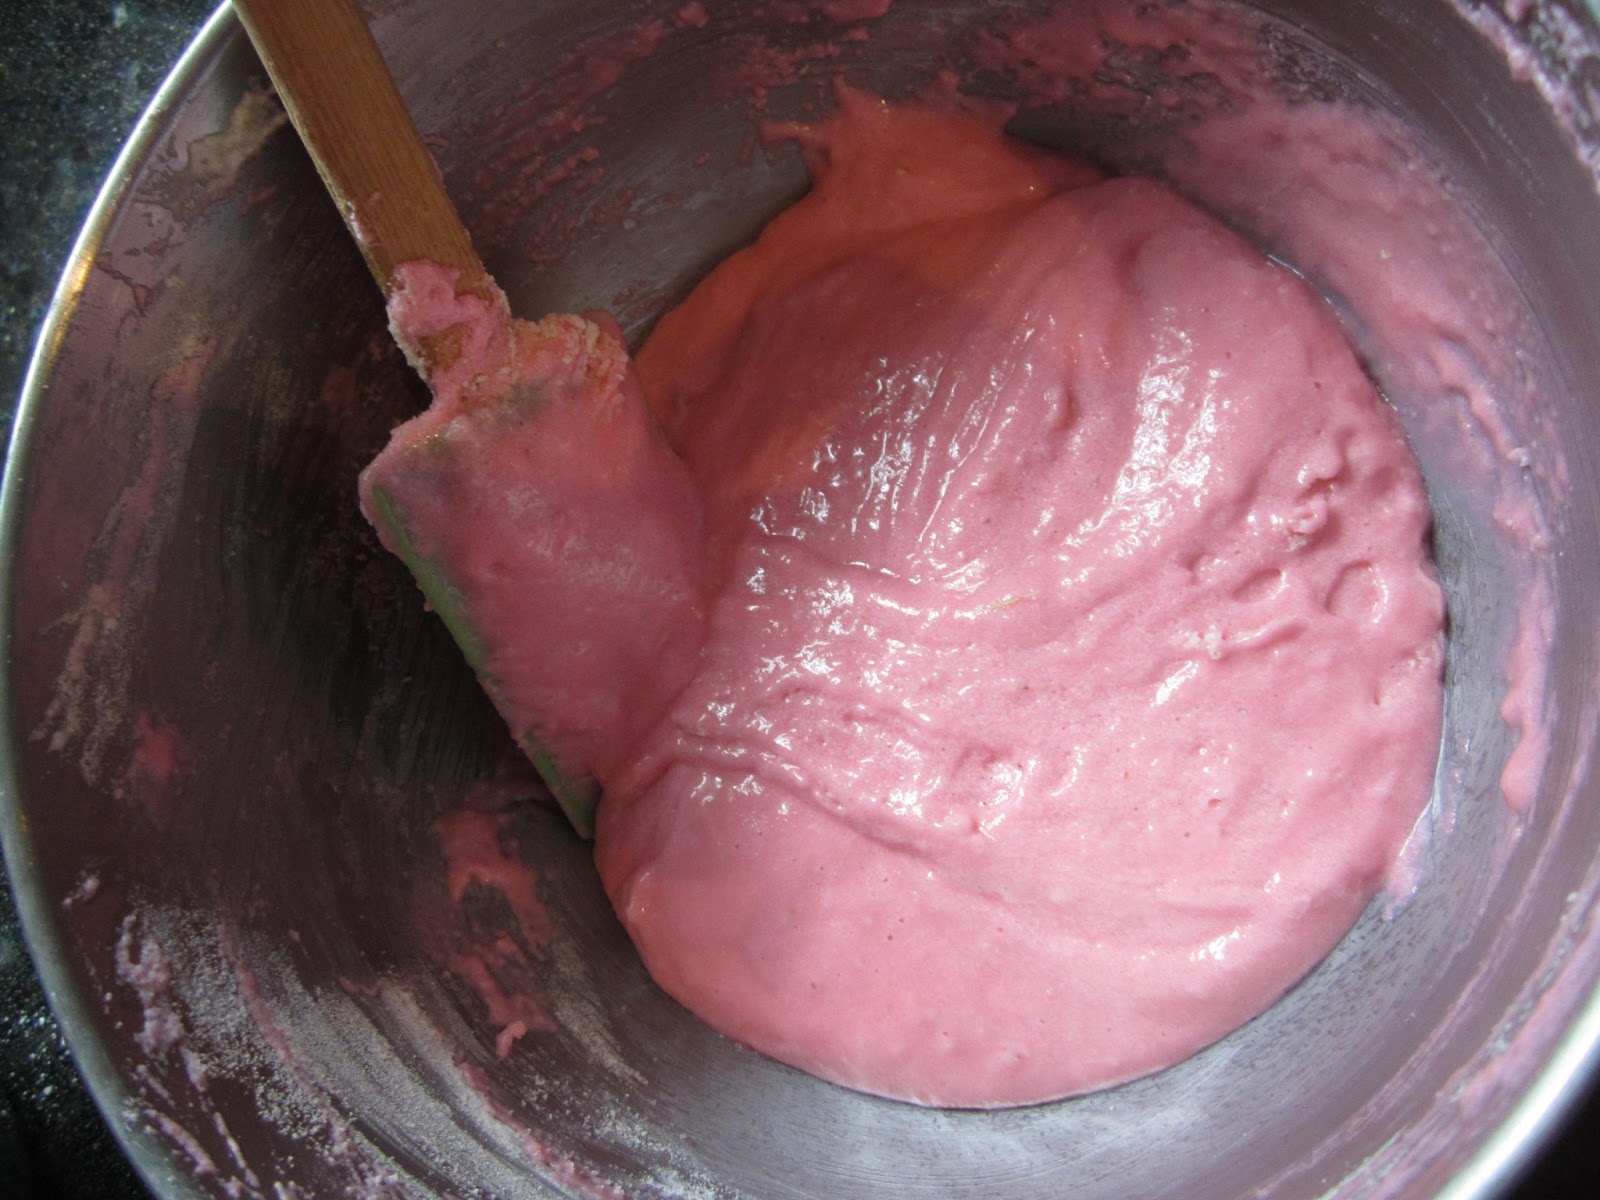
 Now add the food coloring and extract if you're making flavored macarons.  If this is your first time making these, stick to the basic recipe.  I added pink food coloring since this batch is going to be raspberry filled.  You can put away the electric mixer, as you won't need it from this point forward.  When working with egg whites, you need to be very gentle.  DO NOT whisk in the coloring.  Use a rubber spatula to gently fold the color in.  If you deflate the egg whites, you will have flat macarons!


Next, you want to gently fold in the powdered sugar and almond meal mixture.  Fold it into the egg whites in 4 additions.  Don't under mix or your macarons will crack while baking.  Don't over mix or they will not rise when baking.  The dry ingredients should be just incorporated.


Prepare your baking sheet by lining it with parchment paper.  You will want to cut the paper to size so that it fits neatly.  Spoon the batter into the pastry bag that has already been fitted with the pastry tip.  Twist the top of the bag closed with one hand and continue to twist, pushing the batter out and piping it onto the baking sheets, making desired size disks as uniformly as possible (this part takes a bit of practice, so don't expect perfection the first time that you do it).


Rap the baking sheet firmly on the counter several times to help release any air bubbles and let the newly formed disks set for 20-30 minutes.  This dries the tops before baking.  While they're setting, preheat the oven to 300 degrees.  My oven is a professional oven and tends to be a bit hotter than the norm, so I set mine to 275 degrees.  After the disks have set for about 30 minutes, it's time to bake these little lovelies!  They'll need to bake 13-18 minutes depending on your oven.


Keep an eye on them.  You'll notice that they'll start to rise a bit and form a "foot" around the base.  Check them after 13 minutes by gently touching the top of one.  It should feel somewhat firm if it's done.  If not, give them a couple of more minutes.  But be careful not to over bake. Let them cool for 10-15 minutes before transferring to a rack to finish cooling.  These guys can be a bit sticky on the bottom, so I usually use a small metal spatula to carefully pry them from the parchment paper.

The last step is to fill them.  You can either use your favorite buttercream frosting recipe or fruit preserves.  The great thing about buttercream is that you can flavor it with virtually anything.  I choose to fill this batch with raspberry preserves.  


Bon Appetite!
  

Wednesday, May 15, 2013

Wedding Season in Full Bloom

Since wedding season is upon us, I thought that I would post some pictures of a wedding I did last July.  The color inspiration came from a Tiffany and Company engagement ring box.  I took the idea of robin's egg blue and infused it throughout the decor.  The trick is to not go overboard.
Photograph courtesy of Peter Rossi (PDR Productions)
   Inside of each box was tucked a little treat.  The reception dinner was at a French restaurant, so what better than French macaroons!  

My next post will explore the art of macaroon making.  It's easier than you think, as long as you have the right equipment.  And it's an elegant detail when entertaining Spring brunches or luncheons.  

Tuesday, May 14, 2013

Jumping In......


So, I’ve thought, and thought, and pondered and thought.  HOW do I start a blog?  I have no idea.  Then I asked myself, WHY do I want to start a blog?  A much easier question to answer.  I am absolutely passionate about event planning.  My own, my family’s, my friend’s, my work place’s.  It doesn’t matter.  I love it.  This blog is a way to share my passion with all of you.  And maybe even inspire some of you along the way.
I am not a formally trained “event planner”.  Heck, I didn’t take one business class in undergrad school.  I am a teacher by profession.  My ENTIRE school year is one event plan after another.  I’ve led and executed very successful school wide fundraising events, teacher professional development, family nights, and faculty parties for thirteen years.  I’ve planned weddings, kids parties, dinner parties, and adult theme parties.  Countless family members, friends and colleagues have all suggested at one time or another that I start a business doing this.  Me?  A business?  Whoa.  Then the idea….why not start with a blog?  So here it is.
I am excited about sharing events, pictures and ideas with you.  I hope that you will check in often, enjoy it, and offer ideas or simply leave comments.

Happy Planning!
Carol